
During the month of August, we got together several times to applique some t-shirts. Hopefully, some of the other gals will post their cute projects too (hint, hint).

To make this one, I used:
cricut cutting machine
doodlecharms cartridge
three 4 x 6 pieces of fabric
heat and bond fusible webbing
an iron
scissors
embroidery thread and needle
patience.
To cut the applique, I practiced the size and layout of the design by cutting it on to scrapbook paper first. I HIGHLY recommend doing that. There's nothing worse than wasting your pretty fabric. Well, maybe famine or pestilence. But wasting fabric is definitely right after that.
Anyhooo - After I found the size and placement that I liked best, I took my fabric square and backed it with Heat N Bond.
FYI: To back your fabric, follow the directions on the back of the Heat N Bond package. Or just have Maribeth do it for you. Like I did.
After Maribeth prepped the fabric for me, I placed it on the Cricut cutting mat and chose my design.
I cut the design three times on three different pieces of fabric so that I could layer the fabric.
I removed the paper backing from the newly cut design and carefully ironed one piece at a time to my t-shirt.
Next, I chose my embroidery floss colors and began stitching.
I used a running stitch to outline the ice cream and a chain stitch to add some interest to the cone.
Check out these
embroidery stitch videos for more info. They helped me a lot.
If my tutorial is super confusing to you (which is highly likely), keep in mind that there are ten million tutorials for making appliques out in bloggy land. I like this one at
Sew Mama Sew.
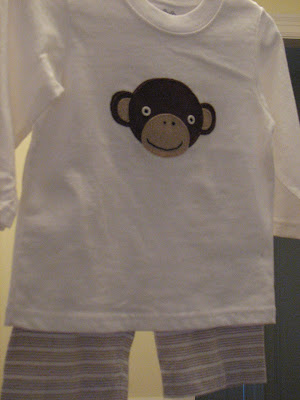
I loved appliqueing so much that I decided to get brave and make a monkey as well. I didn't use the Cricut for this one - I just traced it onto the paper part of the Heat N Bond and cut it out with nice, sharp scissors.



 Back in June Beth made these cute blocks for Father's Day. This week at craft night we decided to make them for Halloween and Christmas. These blocks were super simple and are a great present! Think initials, sport's teams, or quotes (short of course).


