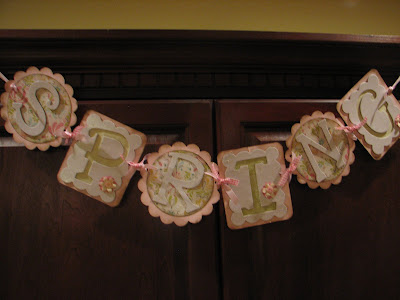
This tutorial was originally posted on: nannygoat blog. This is just my take on it.
Supplies:
2 pieces plain colored cardstock
2 pieces scrapbook paper
2 pieces coordinating scrapbook paper
glue (I prefer Martha Stewart's Gel Adhesive)
glue dots
2 kinds of ribbon
Chipboard letters (I found my kit at Archivers in the Hot Spots section for CHEAP)
Hole punch (I used my Cropodile)
Cricut (If you don't have a Cricut you can use a 6" scallop punch and a circle cutter or punch)
Mini Monograms Cartridge for Cricut
Corner rounder (I looove the fiskars one)
Scissors
Paper cutter
Distress Ink in Walnut Stain
Dauber

How To Do It:
Decide which letters you would like to use from the chipboard kit
then decide which order you would like your patterned paper to be in (this part takes me the longest)
Using The Mini Monograms Cartridge, make three 6 3/4" circles from one of the patterned papers
Then cut three 6 3/4" scalloped circles from the plain cardstock
Using scissors or a paper cutter, cut your coordinating scrapbook paper into small squares and glue behind negative space of chipboard letters to create a backing for the chipboard (like I did with letters P, I, and G).
Cut larger rectangles from the plain cardstock and round the corners with a corner rounder.
When all of your pieces have been cut out, use the Distress Ink to stain the edges.
After all of the pieces have been stained, assemble them using a glue adhesive

Next use a hole punch to cut holes for the ribbon.
Use two kinds of ribbon to tie the pieces of the banner together.
Embellish as desired.
I used paper flowers, buttons, and rhinestones to embellish mine.


No comments:
Post a Comment